Getting Started
This guide walks you through setting up your ReaSnow S2 for the first time. After these 3 steps, you will be in a game using your preferred mouse and keyboard.
What’s in the Box
- ReaSnow S2 device × 1
- USB-C cable × 1
- Quick Start leaflet × 1
Know Your Ports
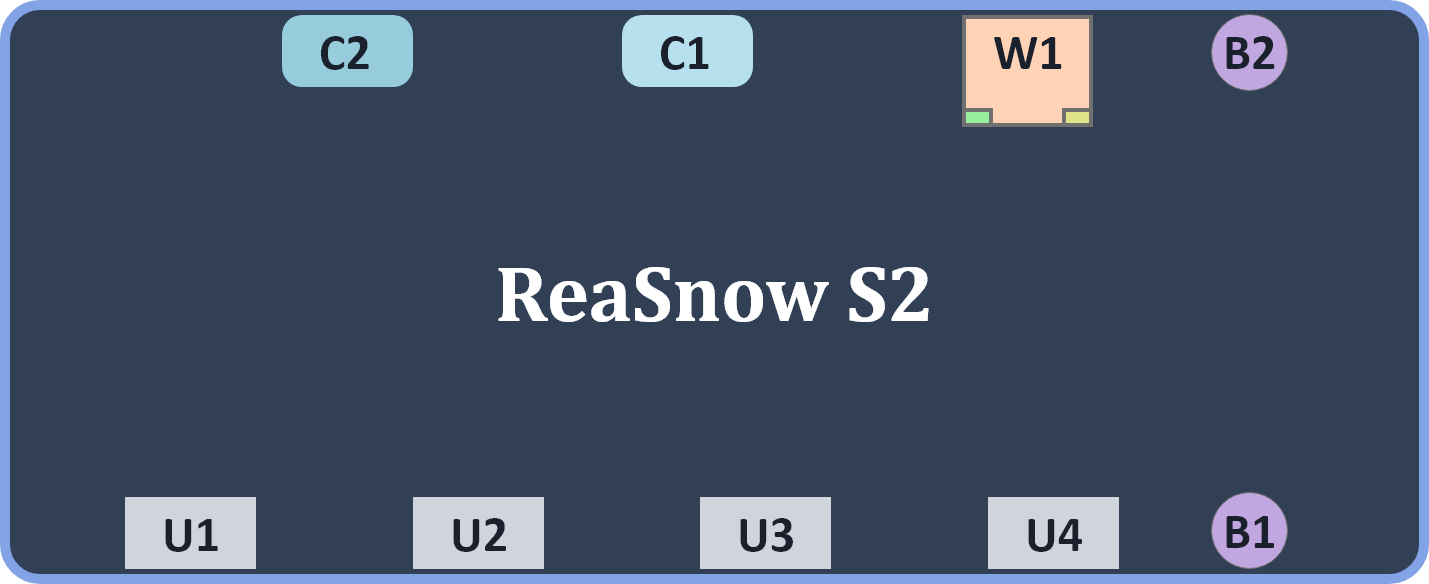
| Pin | Interface Type | Typical Use | Notes |
|---|---|---|---|
| U1 | USB-A | Authentication controller | Official controller for your console |
| U2 | USB-A | mouse,keyboard,controller,etc | input device |
| U3 | USB-A | mouse,keyboard,controller,etc | input device |
| U4 | USB-A | mouse,keyboard,controller,etc | input device |
| C1 | USB-C | Primary output | Main console / PC |
| C2 | USB-C | Secondary output | PC |
| W1 | RJ45 Ethernet | Remote Play dedicated network port | Low-latency wired LAN |
| B1 | Power Button | Power on/off | Long press to toggle |
| B2 | Firmware/Bluetooth Button | Press for BT pairing | Press for BT pairing; hold for firmware upgrade |
ℹ️ Info: S2 is powered over USB-C from the console or PC. No separate power adapter is needed.
Before You Begin
1. Prepare Your Mouse
Set your gaming mouse to the recommended range before connecting to S2:
- DPI: 4000–16000 (5000 dpi recommended)
- Report Rate: 250–1000 Hz (500 Hz recommended)
Use your mouse manufacturer’s software or the onboard DPI button to configure these settings.
2. Configure Your Console
| Platform | Action |
|---|---|
| PS4/PS5 | Settings → Accessories → Controllers → Communication Method → Use USB Cable |
| Switch | Settings → Controllers and Sensors → Pro Controller Wired Communication → ON |
| Xbox | No special settings required |
3. Install the APP
Download ReaSnow Manager on your phone:
- Android: Google Play (search “ReaSnow S2 Manager”), or download the APK from the Download Center
- iOS: App Store (search “ReaSnow S2 Manager”)
💡 Tip: Keep the APP updated to the latest version. The APP and S2 firmware are frequently updated together for compatibility.
Setup Steps
Step 1: Wiring Instructions
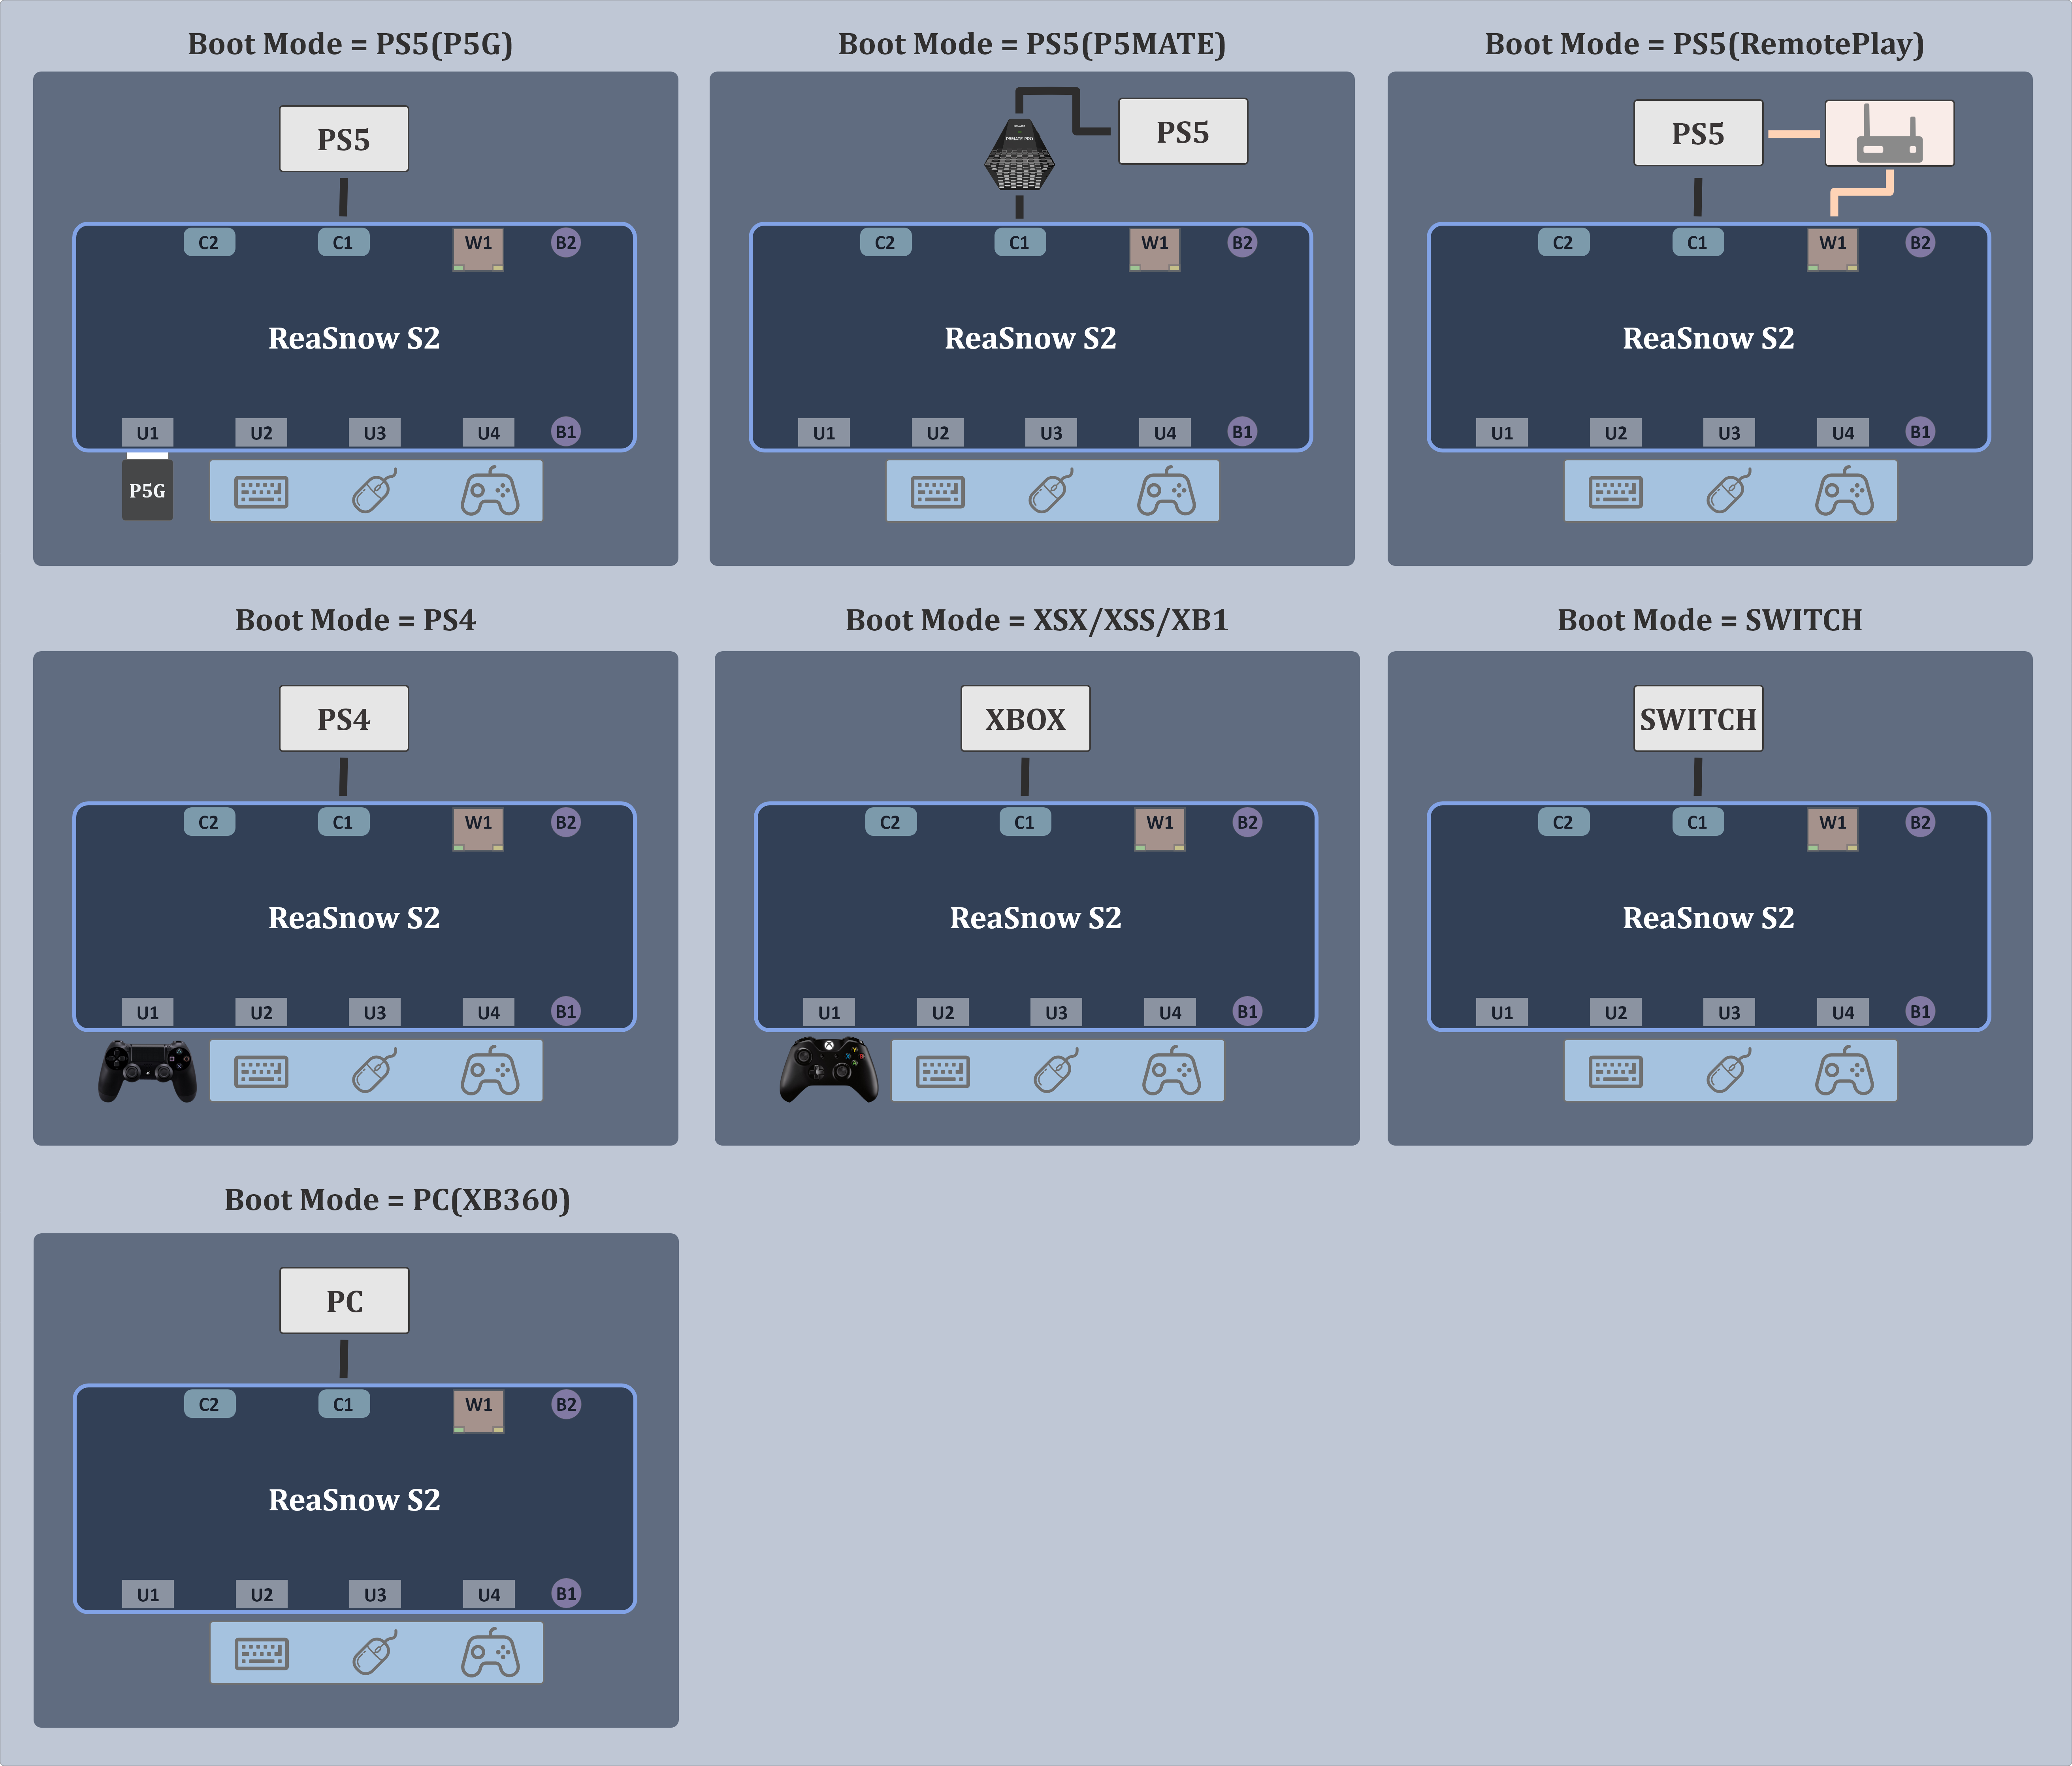
⚠️ Warning: Do not connect through an unpowered USB hub. Plug S2 directly into a console/PC USB port, or use a powered hub. Under-voltage causes authentication failures and disconnects.
Step 2: Connect the APP
- The LED of S2 will show green — it is waiting.
- Turn on Bluetooth and GPS on your phone.
- Open ReaSnow S2 Manager.
ℹ️ Info: Grant Bluetooth and Location permissions when asked, if this is the first connection.
ℹ️ Info: Upgrade to the latest firmware when notified.
ℹ️ Info: Choose the correct Boot Mode for your gaming platform.
ℹ️ Info: S2 stays paired. The next time you power on, the APP auto-reconnects.
Step 3: Add a Game Config & Play
- Switch to the Configs tab.
- Tap Official Configs to browse pre-made game configurations.
- Select a config and add it to your S2.
You are ready. The mouse and keyboard now translate to controller inputs with the selected game config.
- Press the activation hotkey to switch between configs mid-game.
- Use the IO Monitor page any time to verify that all buttons and sticks register correctly.
Firmware Note
Check the firmware version in the APP and upgrade to the latest before your first game session.
Detailed steps → Firmware Update
Keybinding
Familiarize yourself with the default key bindings and customize them to fit your playstyle.
Full guide → Keybinding
Mouse Tuning
Adjust in-game settings and mouse parameters according to your config recommendations.
Tuning guide → Aim Tuning